Adding Projects
To create a new project, navigate to either the Experiment Browser or the Projects page under the Journal tab and click on the Add Project button.
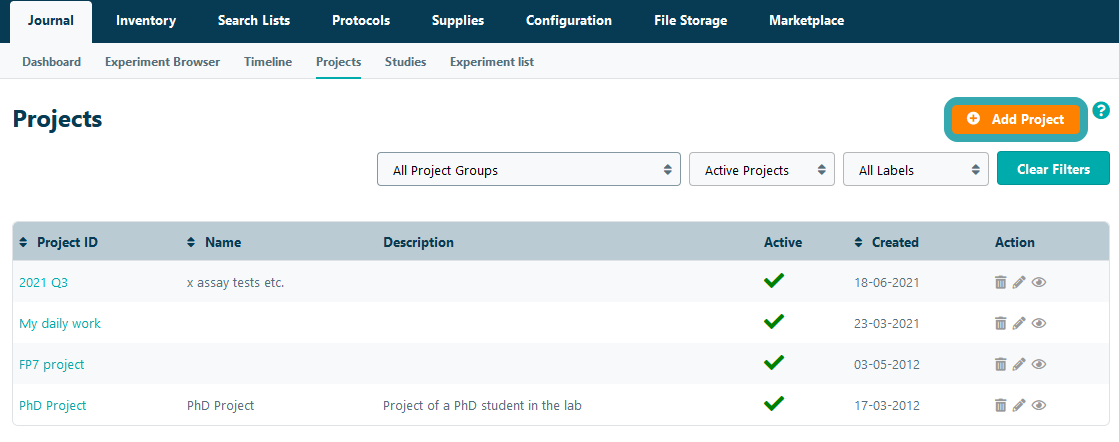
You can enter the following information when adding a project:
- Project ID – The project identifier used in the lab to discriminate each project (required)
- Project Name – The project name used in the lab
- Project Description – A description of the project
- Project Notes – Notes about the project
- Project Collaboration – Set lab members who you want assign as collaborators in each experiment added to this project
- Project Status – Set the project status to active or inactive
- Project Labels – Add labels filter project by on the Projects page
Note: you can change the labels of the Project ID and Project Name fields in the Group Settings to better align with the terminology used by the lab when describing their projects.

Optionally, you can store additional information for a project by adding custom project specification fields. You can add either a Text Field to enter additional information or a File Attachment Field to link a project file

Click Add Field, select the field type, and specify how you want to label the field.
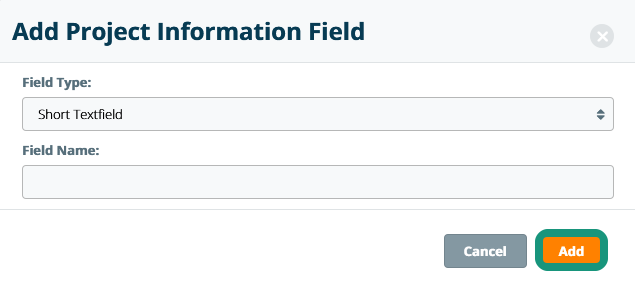
Once a field has been added, you can update, remove or change the order of the fields using the icons inline with the custom field.
