Auto-numbering of Samples
Important Notice - In June 2024, we released a new version of our Inventory system. Updated documentation for the Inventory is available in our new Support Portal. All documentation for the entire eLabNext platform will be fully migrated to the new Support Portal over the course of 2024. Start using the new Inventory documentation.
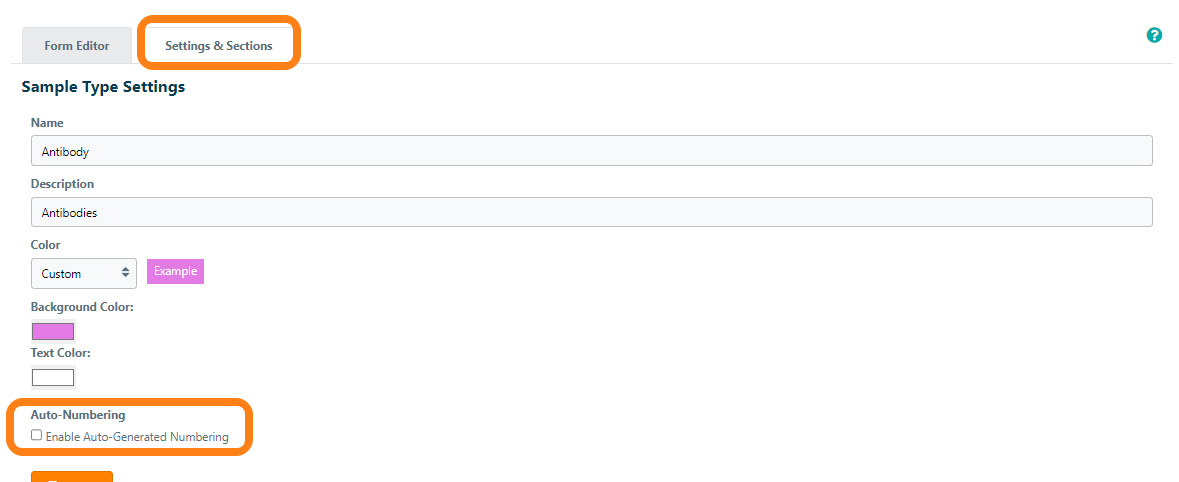
eLabInventory allows users set up auto-incrementing fields when creating new samples of a particular sample type. Navigate to the Sample Types page under the Configuration tab and click the Edit icon of the sample type for which you want to enable auto numbering. Check the option Auto-numbering under Settings & Sections to enable auto-numbering for samples.
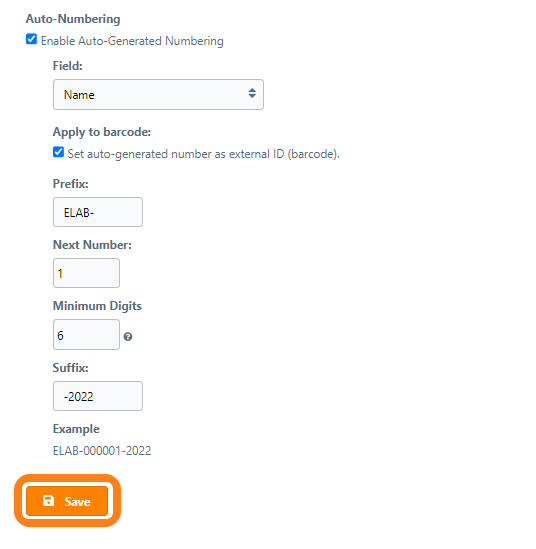
The following settings can be configured when auto-numbering your samples:
- Field: determines whether the auto-numbering setting will be applied to the sample's Name, one Sample Specification Field of the user's choice, or No Field (Apply to barcode only)
- Apply to barcode: click "Set auto-generated number as external ID (barcode)" checkbox to apply the generated value as an external ID (Note: this will be set to both the external ID and the sample's name/specification field if those options were selected from the Field dropdown)
- Prefix: text that will be prepended to the auto-incremented number
- Next Number: lists the number that will be applied to the next newly-created sample of this Sample Type (Note: this value will automatically increment by a value of 1 each time a new sample is created when the auto-numbering setting is active)
- Minimum digits: sets the minimum number of digits in leading zeroes that will be listed for the number (ex. if Minimum Digits is set to 5 and Next Number is set to 8, then the next value generated will be "00008")
- Suffix: text that will be appended to the auto-incremented number
- Example: this field will automatically populate with an example value based on the settings above
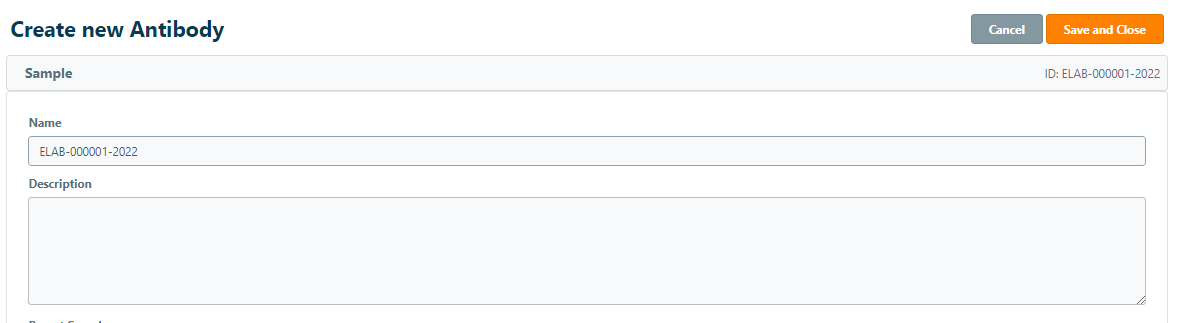
Once the desired settings have been selected, click the Save button to apply the changes to all newly-created samples of the sample type. Note: this will not retroactively apply to any existing samples. If the user has set the Next Number field to lower than its current value, they will be asked to reconfirm the settings before saving them. Because external IDs associated with samples must be unique within the group, the system will check the settings against all existing samples and abort the save if the it identifies a potential duplicate within the inventory.