Printing Barcode Labels
Important Notice - In June 2024, we released a new version of our Inventory system. Updated documentation for the Inventory is available in our new Support Portal. All documentation for the entire eLabNext platform will be fully migrated to the new Support Portal over the course of 2024. Start using the new Inventory documentation.
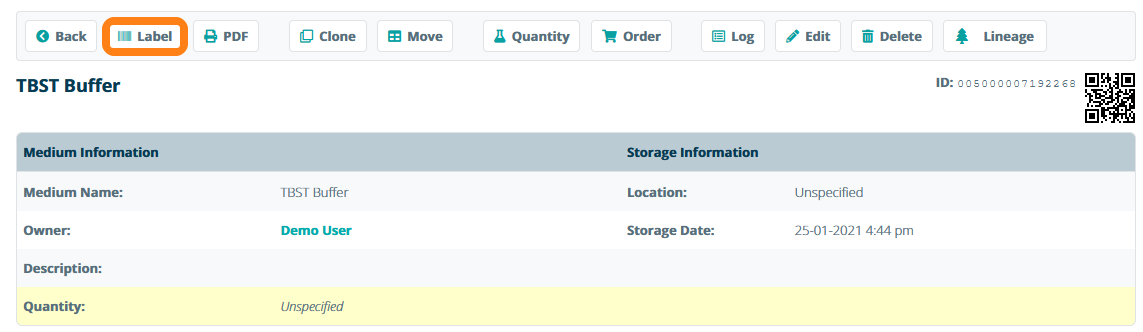
You can label tubes with a 2D barcode to better identify samples within the lab. To print barcode labels for your samples, first ensure that you have correctly installed one of the label printing add-ons available in the Marketplace. Once you have connected a printer to your account, you can print a label by clicking on the Label button on the sample information sheet.
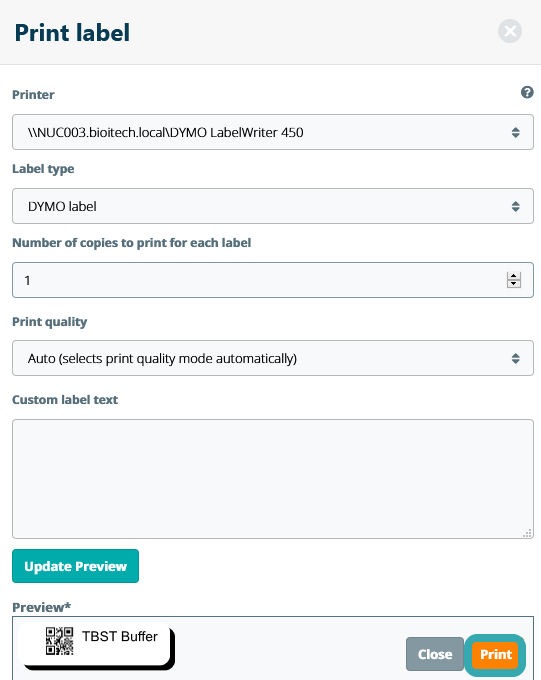
In the case of printing labels with a DYMO LabelWriter©, you can select the type of label you want to print. Note that you should first create a label template. In the appeared label preview window you can see a preview of label you will print.
When printing a label with a Zebra Label Printer, a pop-up window is only shown this is defined in the print mode. Prior to printing a label, a .zpl label template for samples should be created first.
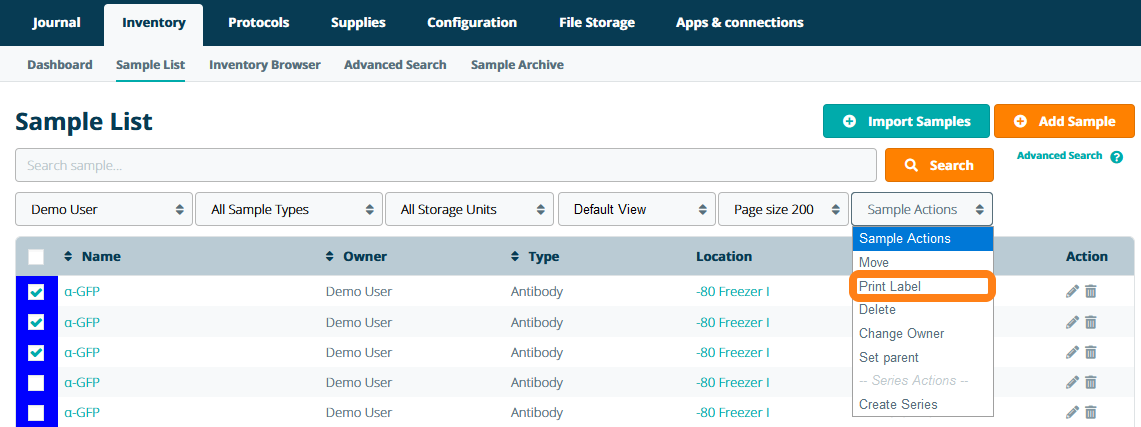
You can also print labels in bulk of multiple samples at the sample time by selecting samples using checkboxes and choosing the Print Label option in the Sample Actions dropdown menu that is present in the Sample List, Inventory Browser and the Advanced Sample Search.