eLabSync File Uploader
Install eLabSync File Uploader to set up a one-way synchronization of local files from your computer to your eLabJournal account. Files can be automatically uploaded from any folder on your local computer to your dashboard and attached to experiments. Use eLabSync to monitor the folder in which you store all data resulting from experiments, or install eLabSync on a computer linked to a device that takes overnight measurements to monitor and log data output at home.
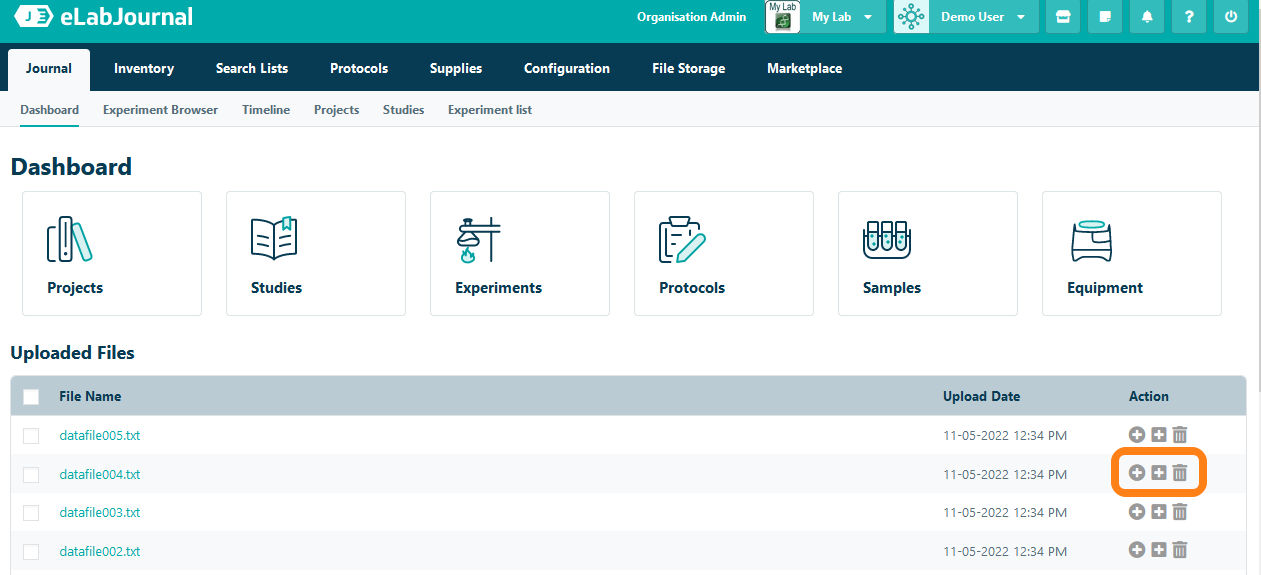
The following actions can be performed with the uploaded files that appear on your dashboard:
- Link file to an experiment - the uploaded file is moved to a file section of the selected experiment
- Move to file storage - the uploaded file is moved to file storage for attaching it to a sample
- Remove file - the uploaded file will be removed (the file is permanently deleted as it was not associated with any experiment yet)
Installation of eLabSync
Start by downloading eLabSync and run the installation wizard to install eLabSync on your PC. Note that eLabSync is not yet available for Mac.
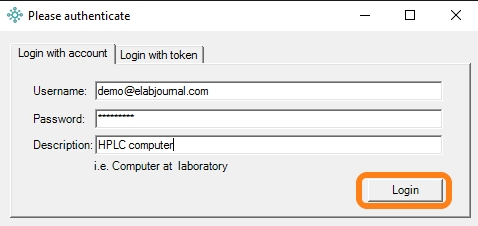
After installing and launching eLabSync, you first need to authenticate by logging into the eLabSync application before uploading files from your local PC to eLabJournal. Enter your email address and password and click Login to link eLabSync to your account. Please note that eLabSync requires your computer to have a connection to the internet and you must already have a registered eLabJournal account.
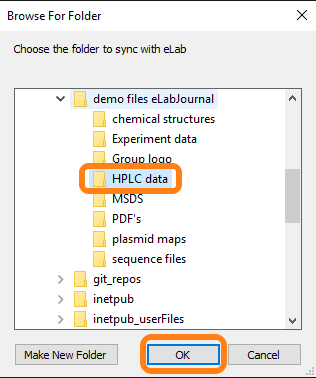
After login, proceed by selecting the folder from which files should be synced to eLabJournal and clicking OK. Note that eLabSync only monitors files added directly to the selected folder and not files in subfolders.
After eLabSync has been configured, the application is added to the system tray of your computer.
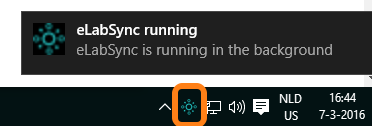
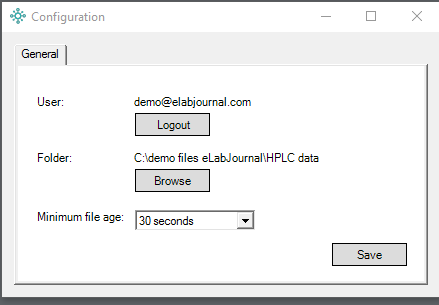
Click on the eLabSync icon in the system tray to open the application settings. You can quit the application, force a direct sync of the monitored folder, or open the settings. In the settings, you can logout, change the monitored folder, or adjust the minimum age of the files (i.e. time after adding of the file before the upload starts).
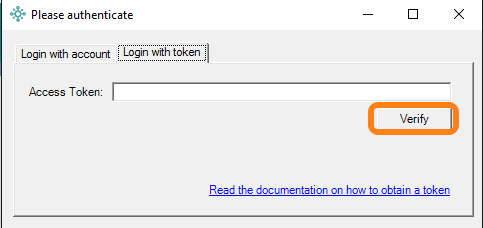
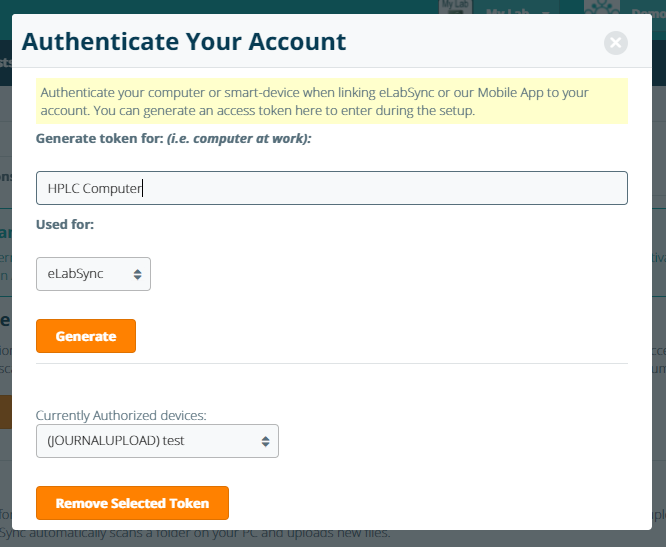
If your lab uses an organization-specific login (LDAP/AD/SSO) you must log in using an access token. You can generate the access token in the web application by navigating to My Account – Apps & Connections

Click Manage Authentication under the eLabSync App.

Access tokens are like one-time passwords that are used to authenticate an external application or device. The advantage is that you can remove access tokens at any time to disable an external device or application that is connected to your eLabJournal account. Access tokens are also used with an organization-specific login to authenticate external devices (in these instances, the web application does not store any login credentials). Label the access token and click Generate to create the token.
Copy the newly generated access token from pop-up window.
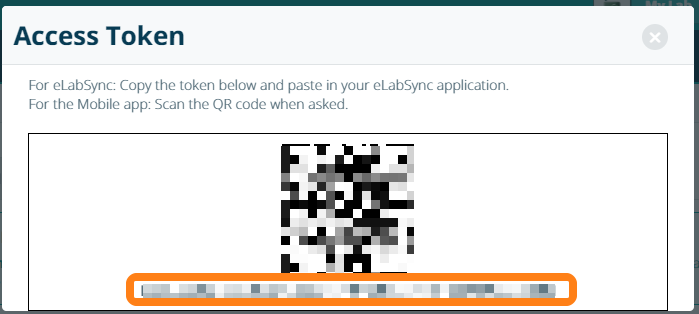
Paste the access token into the eLabSync application after selecting the tab Login with token and click Verify to complete authentication. Note that generated tokens can also be used for authentication with the Mobile App or the API.