RackScan add-on
This documentation assumes that you are an existing user or customer of eLabJournal and that you completed the RackScan add-on installation procedure. In case you are new to our software products, please contact us to schedule an online meeting to discuss your use case and to configure the eLabJournal software.
After completion of the RackScan installation, RackScan is connected to eLabJournal. To start, proceed as follows
- Open the RackScan Analyzer™ Software
- Place the Rack with CryoVials on RackScan and initiate the scanning process
Please note that it is required that the rack barcode is also included in the scan. We recommend configuring RackScan Analyzer to use the Orientation Barcode located at the bottom of the rack or to use RackScan s.
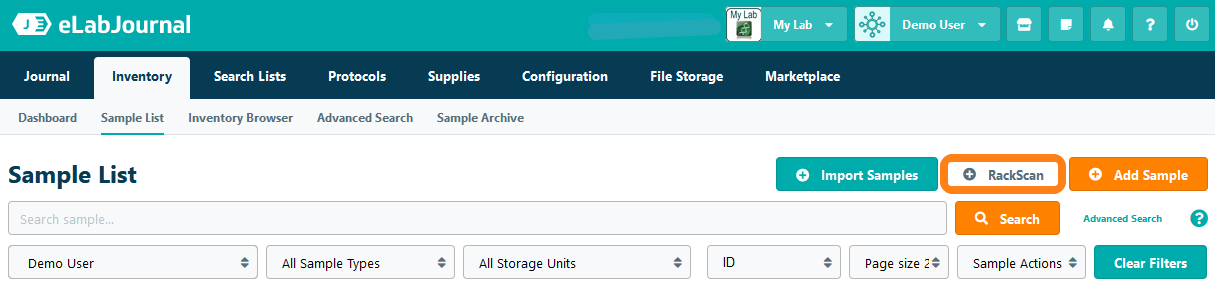
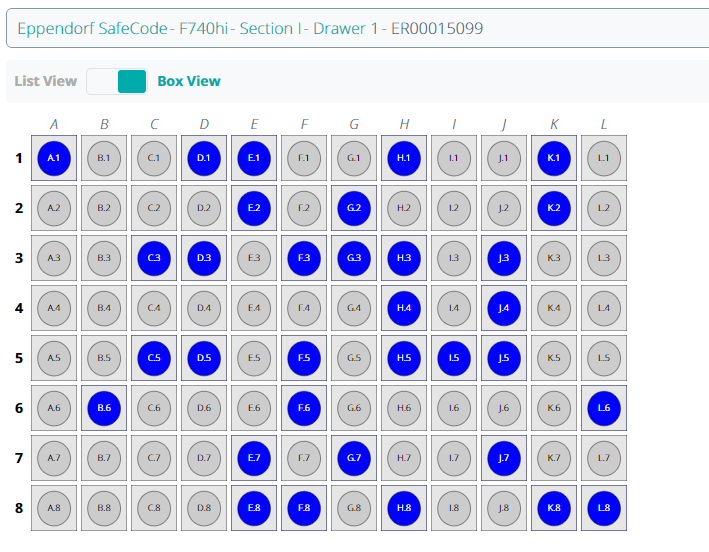
To add the vials scanned with RackScan to eLabJournal, navigate to Sample List in the Inventory menu and click the RackScan button to activate RackScan.
In the appeared window, you can upload the output file from the scanned plate.
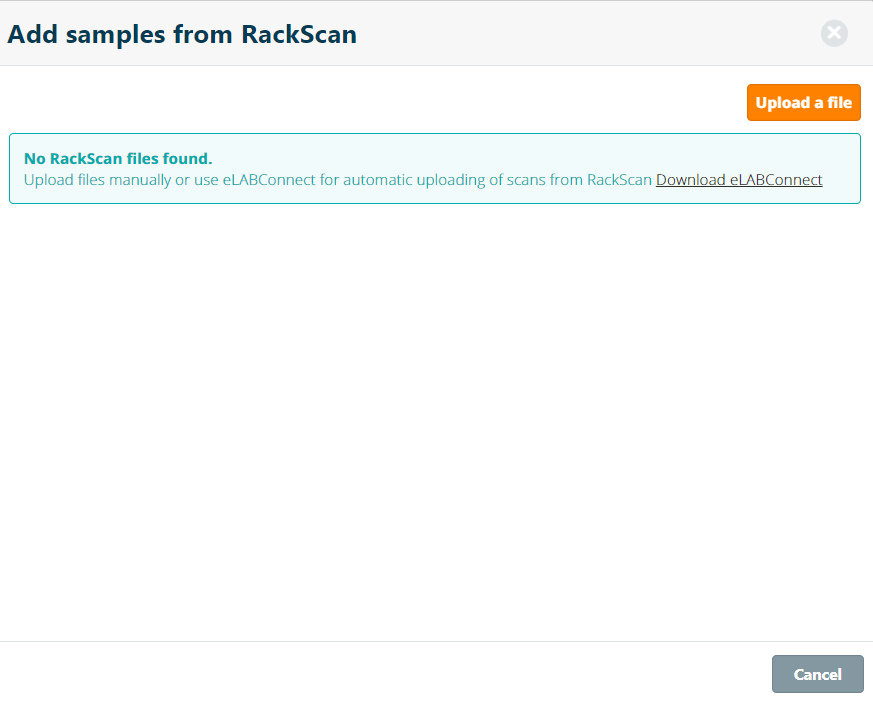
To make files automatically available after scanning a plate with RackScan, please install and configure eLABConnect.
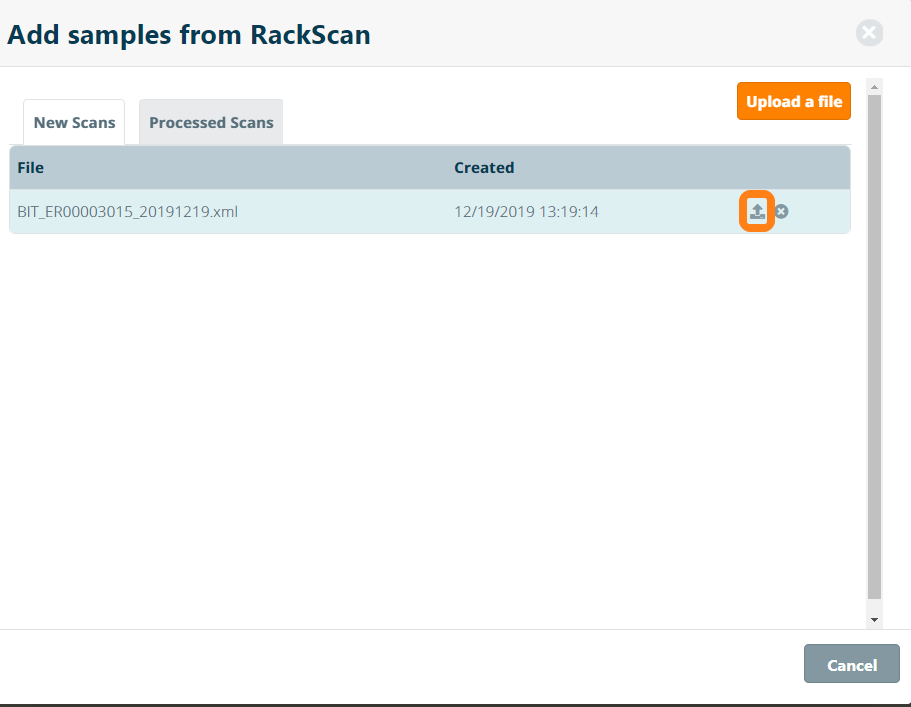
Once the file is uploaded, click load to process the file.
During the file processing, the RackScan add-on will perform the following validation steps
- Check for the existence of the rack barcode in eLABJournal
- Check for the existence of all vial barcodes in eLABJournal
- Verify if the positions of the vial in eLABJournal are in sync with positions of the vials in the scanned rack
In case of absence or mismatch with any information in eLabJournal, the RackScan add-on will sequentially guide you through a workflow to 1) Identify the rack, 2) identify the vials and import the vial contents and 3) sync the positions of the rack prior to enabling the sample actions.
1 - Rack Identification
In case no rack was identified in your group with an associated barcode that is identical to that of the scanned rack, the RackScan add-on will guide you through the steps to create this rack.
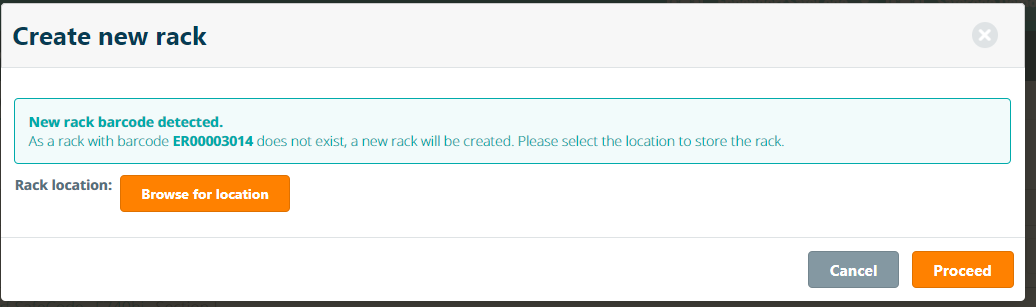
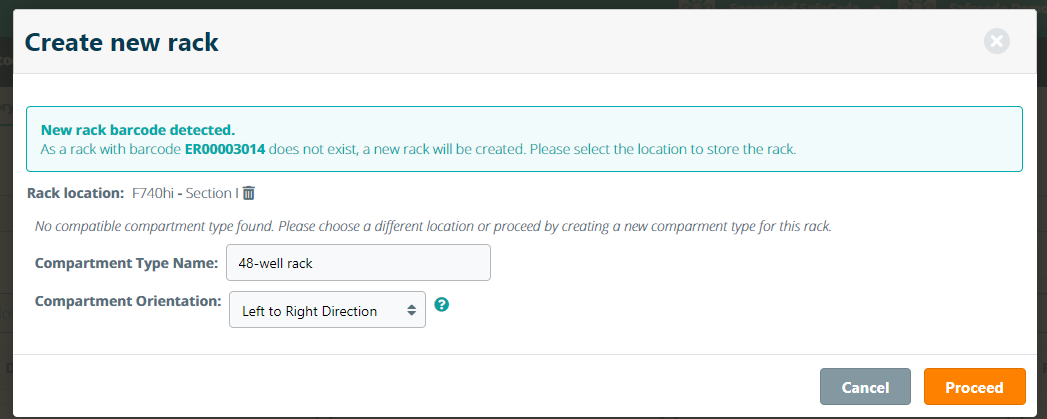
Click Proceed to complete the creation of the Rack. After the addition of the rack, the validation workflow automatically continues
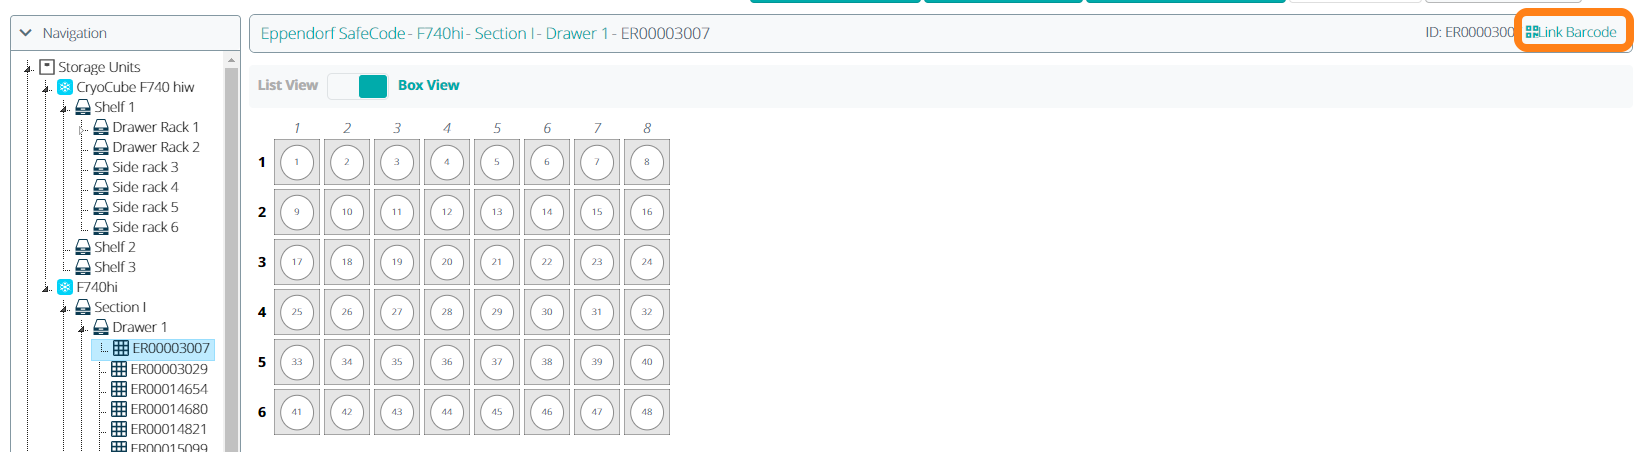
Note in case you want to use an already existing rack in eLAB to store samples, you can manually associate the barcode in the inventory browser (requires the installation of the Compartment Barcode add-on as available in the Marketplace).
2- Vial identification and the linking of sample information
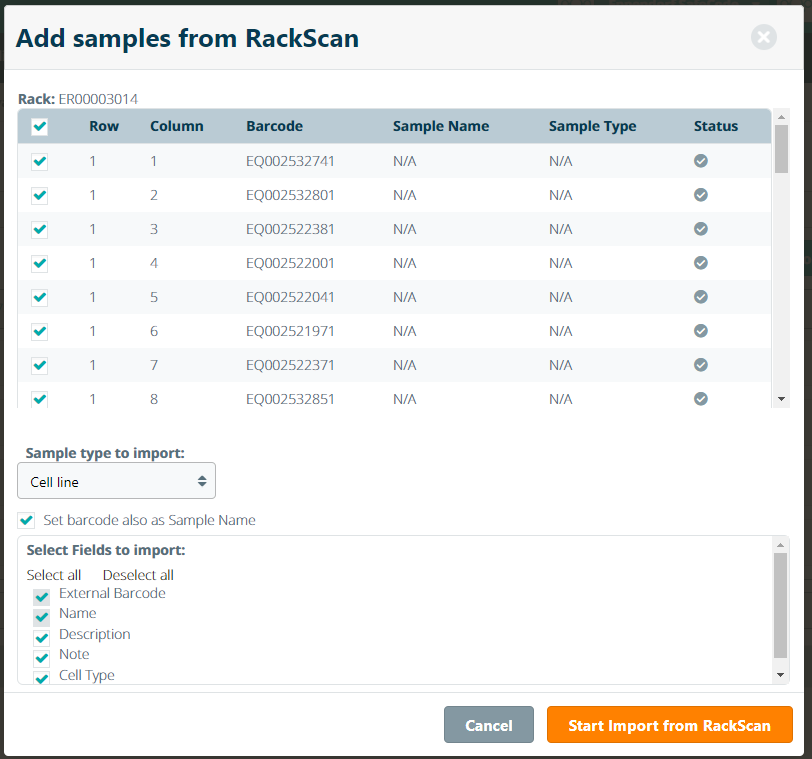
Once the rack has been identified in eLabJournal, yet one or more CryoVials in the scanned rack are not yet identified, the RackScan add-on will guide enable you to create those samples and associate the vial barcode.
Start by selecting the sample type for the samples in the Cryovials you are storing (read here how to add custom sample type templates). Optionally you can choose to also set the barcode as the sample name by selecting the corresponding option. Click Start Import.
Next, you will be guided to the Sample Batch Import in which you can enter all sample-specific information for each vial. You can either complete that information manually or use the paste from the clipboard function to add information in bulk from Excel.
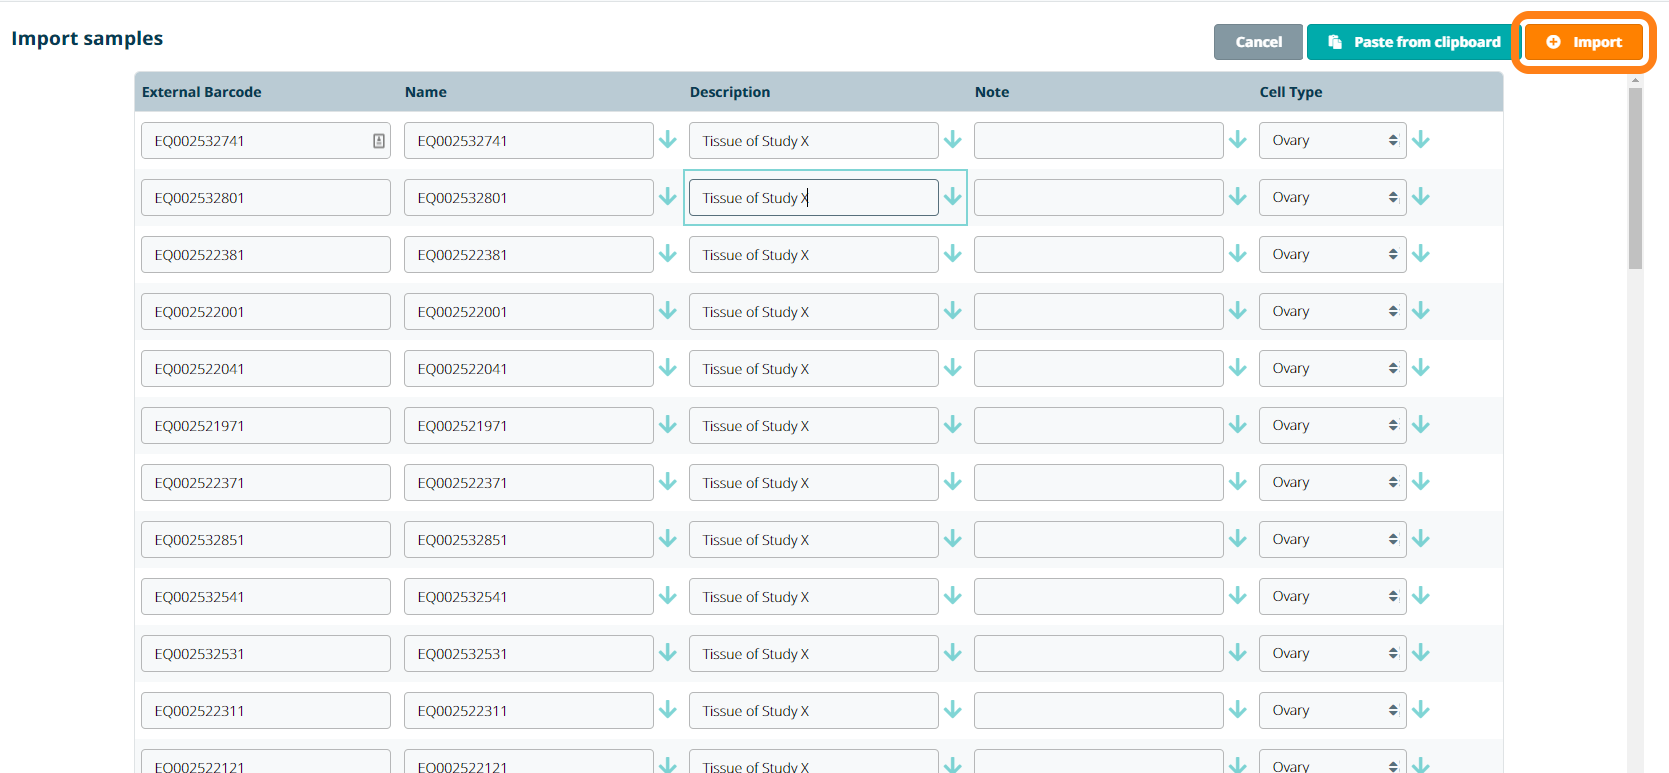
When the sample-specific information has been entered, click Import to add the samples, associate the vial barcode and place them in the corresponding position in the rack. Please note that by setting or changing the compartment orientation, you can control the direction in which samples are added in the rack (the default setting for all compartments is from left to right)
3 - Syncing rack
One the rack barcode and all vial barcodes have been identified, the RackScan add-on checks if the positions of all samples in eLabJournal are in sync with the positions in the scanned rack.
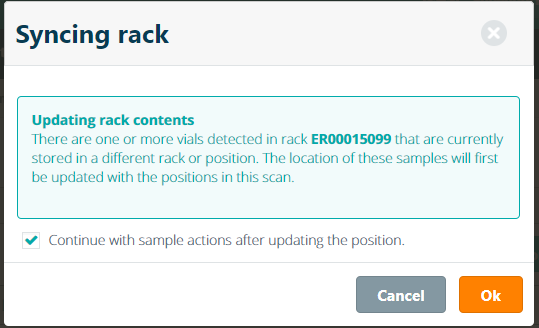
Click Ok to sync the positions of the samples in scanned Rack with the positions of the samples in eLabJournal

Note that samples are no longer stored in the scanned rack in eLabJournal and will be moved to an unspecified location.
4 - Performing Sample Actions
In case all of the following criteria are met:
- The rack has been identified in eLabJournal
- All barcoded vials have been identified in eLabJournal
- The contents of the scanned rack are in sync with eLabJournal
The Rack Scan add-on proceeds and enables you to perform sample actions for the samples stored in the scanned rack.
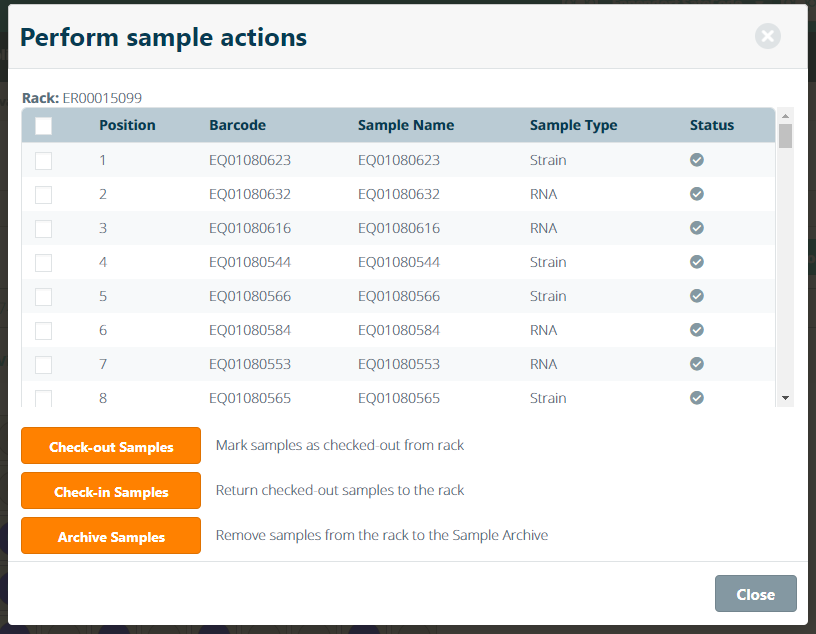
The following actions are supported
- Sample Check-out – Samples are marked as checked out from the box (i.e to indicate that the samples were taken from the freezer). This action is automatically logged in the sample log
- Sample Check-in – Samples marked as checked out can be returned to the freezer. This action is automatically logged in the sample log.
- Archive Samples – Samples are moved to the sample archive. Please note that for archived samples, the vial barcode remains stored and cannot be reused for new samples in accordance with GLP compliance.
Interested in a custom workflow tailored to the needs of your lab, please contact us to request a quote for customization of the RackScan add-on for your lab.