Adding Sample Types
Important Notice - In June 2024, we released a new version of our Inventory system. Updated documentation for the Inventory is available in our new Support Portal. All documentation for the entire eLabNext platform will be fully migrated to the new Support Portal over the course of 2024. Start using the new Inventory documentation.
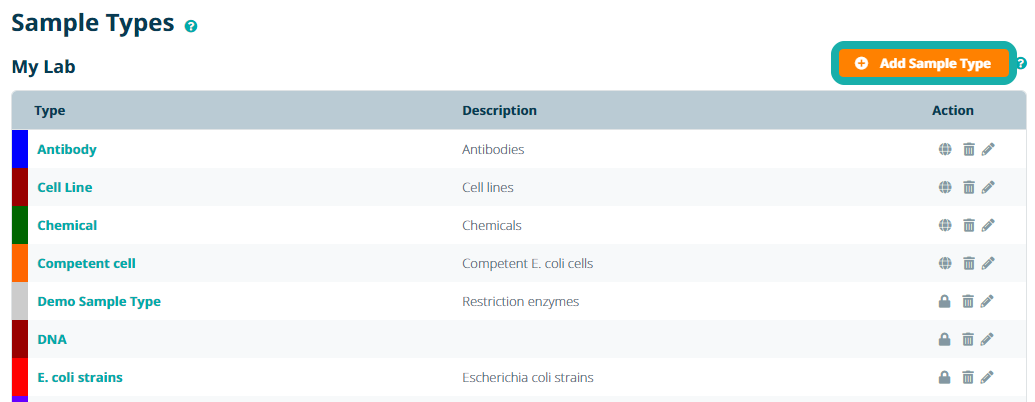
To create a new sample type, navigate to Configuration – Sample Types. Here you can find a list of all sample types defined for your lab.

Click Add Sample Type to add a new sample type template.
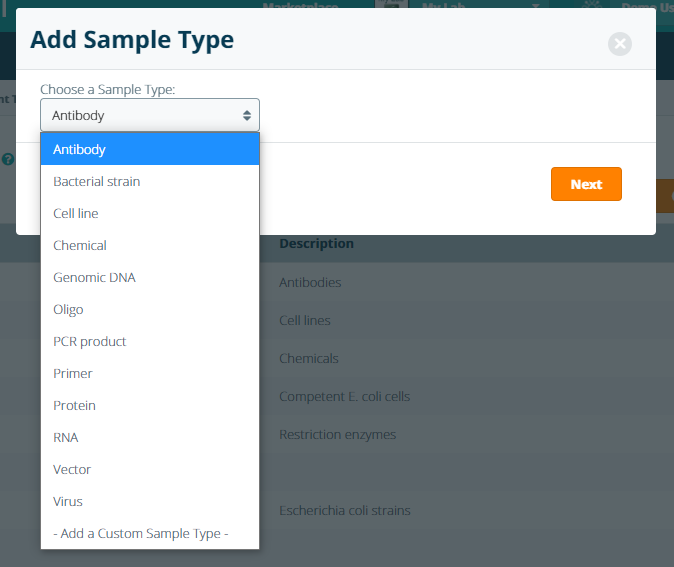
When adding a sample type, you can choose to either use one of the pre-generated system templates or select Add Custom Sample Type to design an entirely new custom sample type. Note: clients with a Private Cloud or On-Premises installation can customize the list system templates ensure that all of their groups have access to the same templates options.
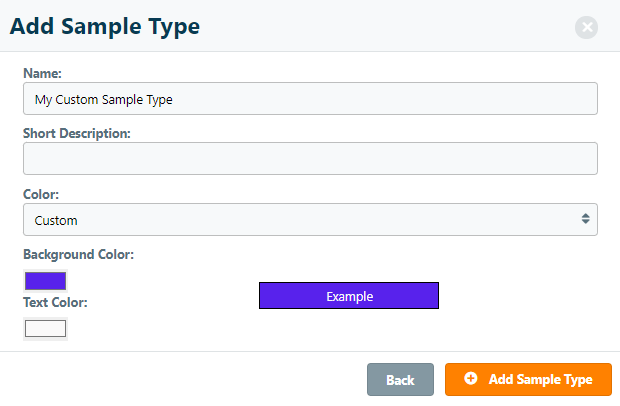
On the next window, select a name, description, and identifying color to mark your samples/tubes in the inventory. Note: selecting the Custom option from the Color dropdown allows the user to choose the color of their Sample Type's background and text. Click Add Sample Type to create the template.
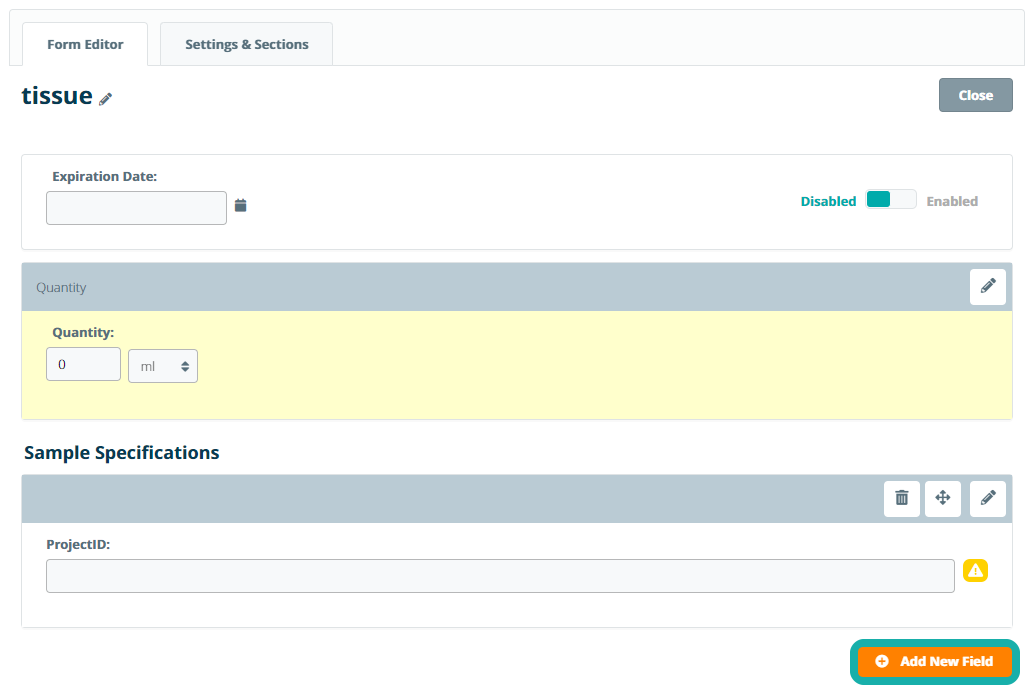
Each sample type starts with has 4 default fields: Sample Name, Description, Location, and Notes. You can customize the sample type with additional sample specification fields by clicking Add New Field. Specification fields can accept different kinds of input, such as textfields, numeric fields, date fields, choice fields and fields for linking samples or file attachments.
In the Settings & Sections tab, you can set the following options:
- Name - change the name of the sample type
- Description - add a description in the Sample Types page list view
- Color - change the color assigned to the sample type
- Auto-Numbering - enable auto-numbering for samples created from the sample type
- Sample Type Sections - sort sample fields into sections and set visibility conditions
